Keep it simple
When you’re getting into beauty photography, it’s easy to want to do THE MOST. The hair, the lips, the lashes, the gem stone appliqués. I get it, it’s fun to experiment and create something kinda out there, but I encourage you to dial it back. If you want to play up a specific feature, stick to that. If you’re dying to do a rhinestone studded winged liner, maybe skip the metallic blue lip and pink wig. Keeping it simple helps give your images a polished and sophisticated look, but once you’re confident with your skills and aesthetic, by all means go nuts!
Make sure your models are well hydrated and have good skin
Since beauty photography is so up close and personal, it’s important to work with models who have a naturally glowing complexion. This isn’t quite as important if you are going for a poreless, super airbrushed vibe, but if you want to showcase natural skin texture like I try to, it’s crucial to start with relatively clear skin. A few blemishes won’t affect the end product but sadly overall uneven, and textured skin will.
Work with skilled make up artists
When you’re looking for a make up artist, look for someone who has strong "no-make-up" looks in their portfolio. I try to find artists who appreciate the natural texture of skin and don’t cover it up with too much foundation. Follow high end make up brands on instagram to keep track of what is on trend.
Make up guru Rio Translado offered this advice for MUAs hoping to get more into beauty work.
“I know makeup can be very intimidating to many of us and going shopping for makeup is even worse. There are many brands and countless products are launched everyday, but just know that makeup is just pigment and it comes in many different textures.
They can be in powders, creams, liquids, gels...with different labels on them to dictate us what they are for and how to use them and where to put them...
My advice to you is, just treat them as multi-purpose and use them whatever ways you want as long as it works for you. Be playful and just go for it. Forget about what they are for.
And don’t forget, less is always more.”
Beauty light set ups don’t have to be complicated
I know it’s so easy to get intimidated by the range of options out there - the gels, the snoots the hair lights etc. I think because I come from a natural light background, single light set ups are the most appealing to me. You can achieve a variety of different looks using only one light in combination with reflectors and v-flats. Beauty dishes, umbrellas and soft boxes will all give you different effects so study the catchlights in your favourite images and see if you can work out what the photographer was using. I tend to prefer either 5’ diffused umbrellas for soft light or beauty dishes for more drama.
Don’t create highlights where highlights don’t exist
I see this a lot with beauty photography post production. The retoucher will paint highlights in, down the nose, on the cheekbones etc and it always ends up looking a bit artificial. This is why it’s so important to have a make up artist who understands reflective pigments and can be on set to amp up the gloss or tone it down in areas that you don’t want reflection in real time. Part of the fun for me is emphasizing highlights and shadows using dodge and burn but I stick to the ones that exist already, rather than creating new ones.
I’m always posting new work at @katewhytephoto so feel free to follow along!

Jessica of Lizbell Agency with make up by Rio Translado
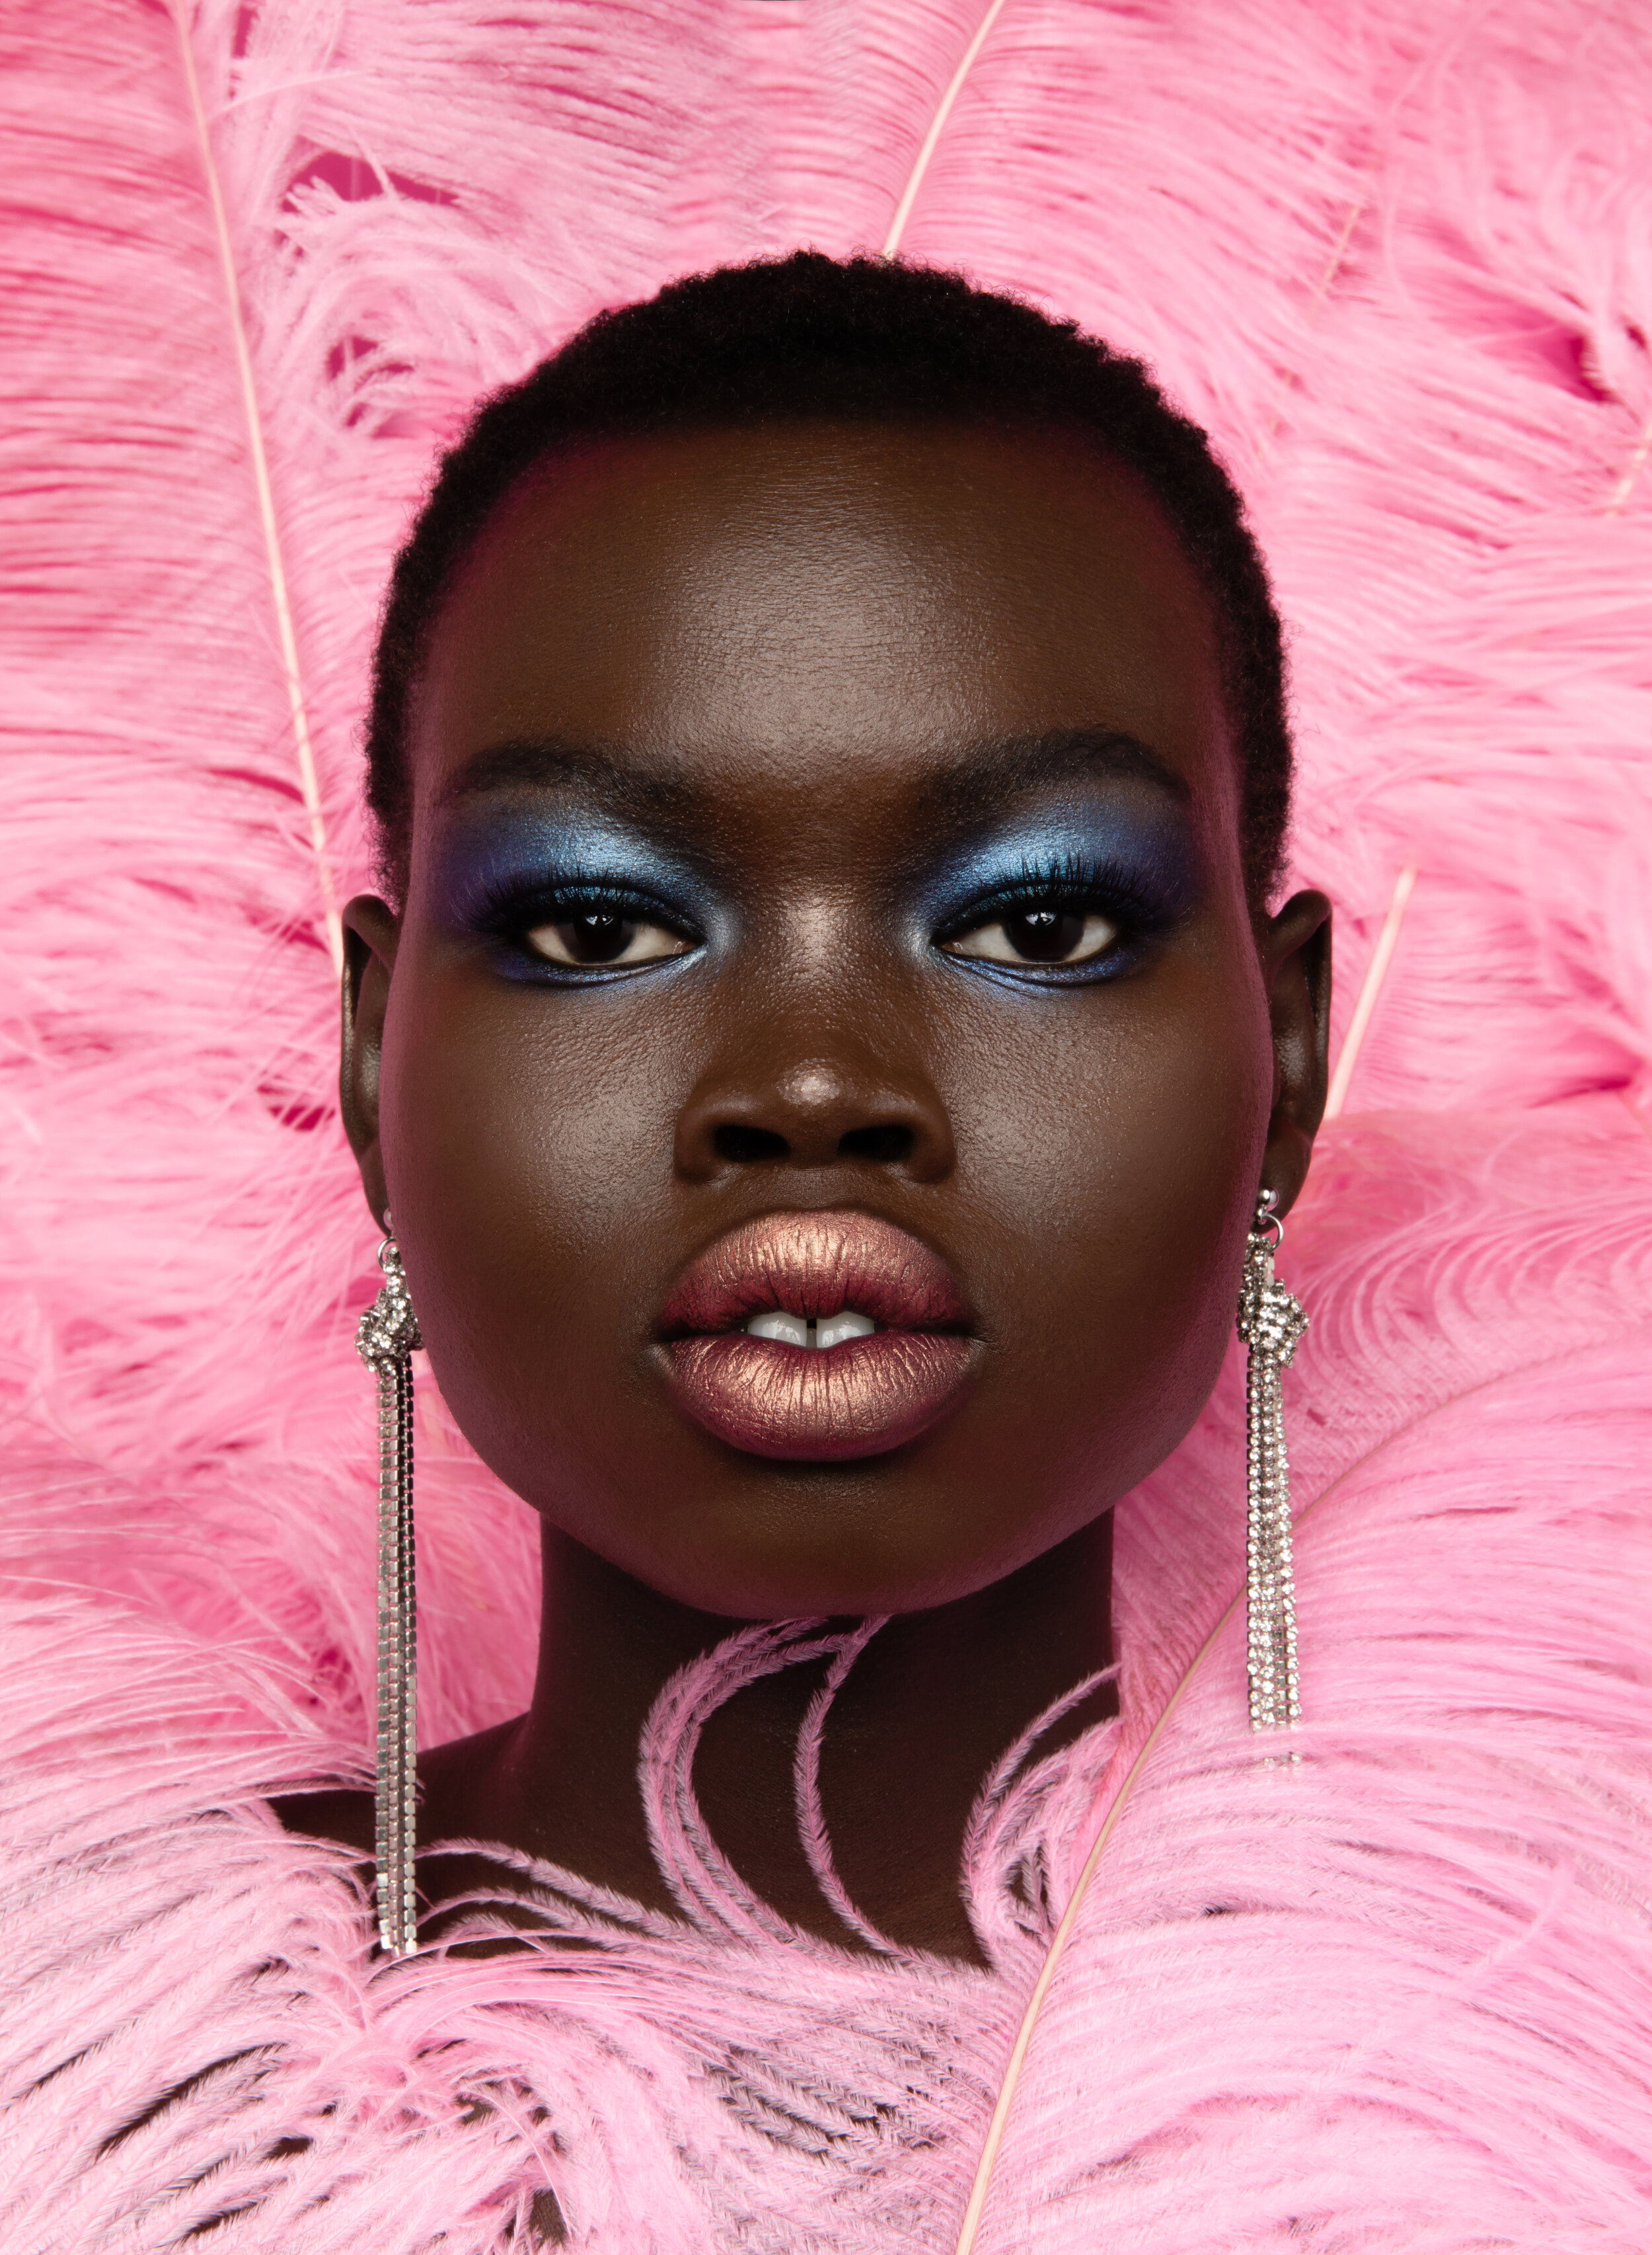
Alakiir with make up by Rio Translado and styling by Marchel
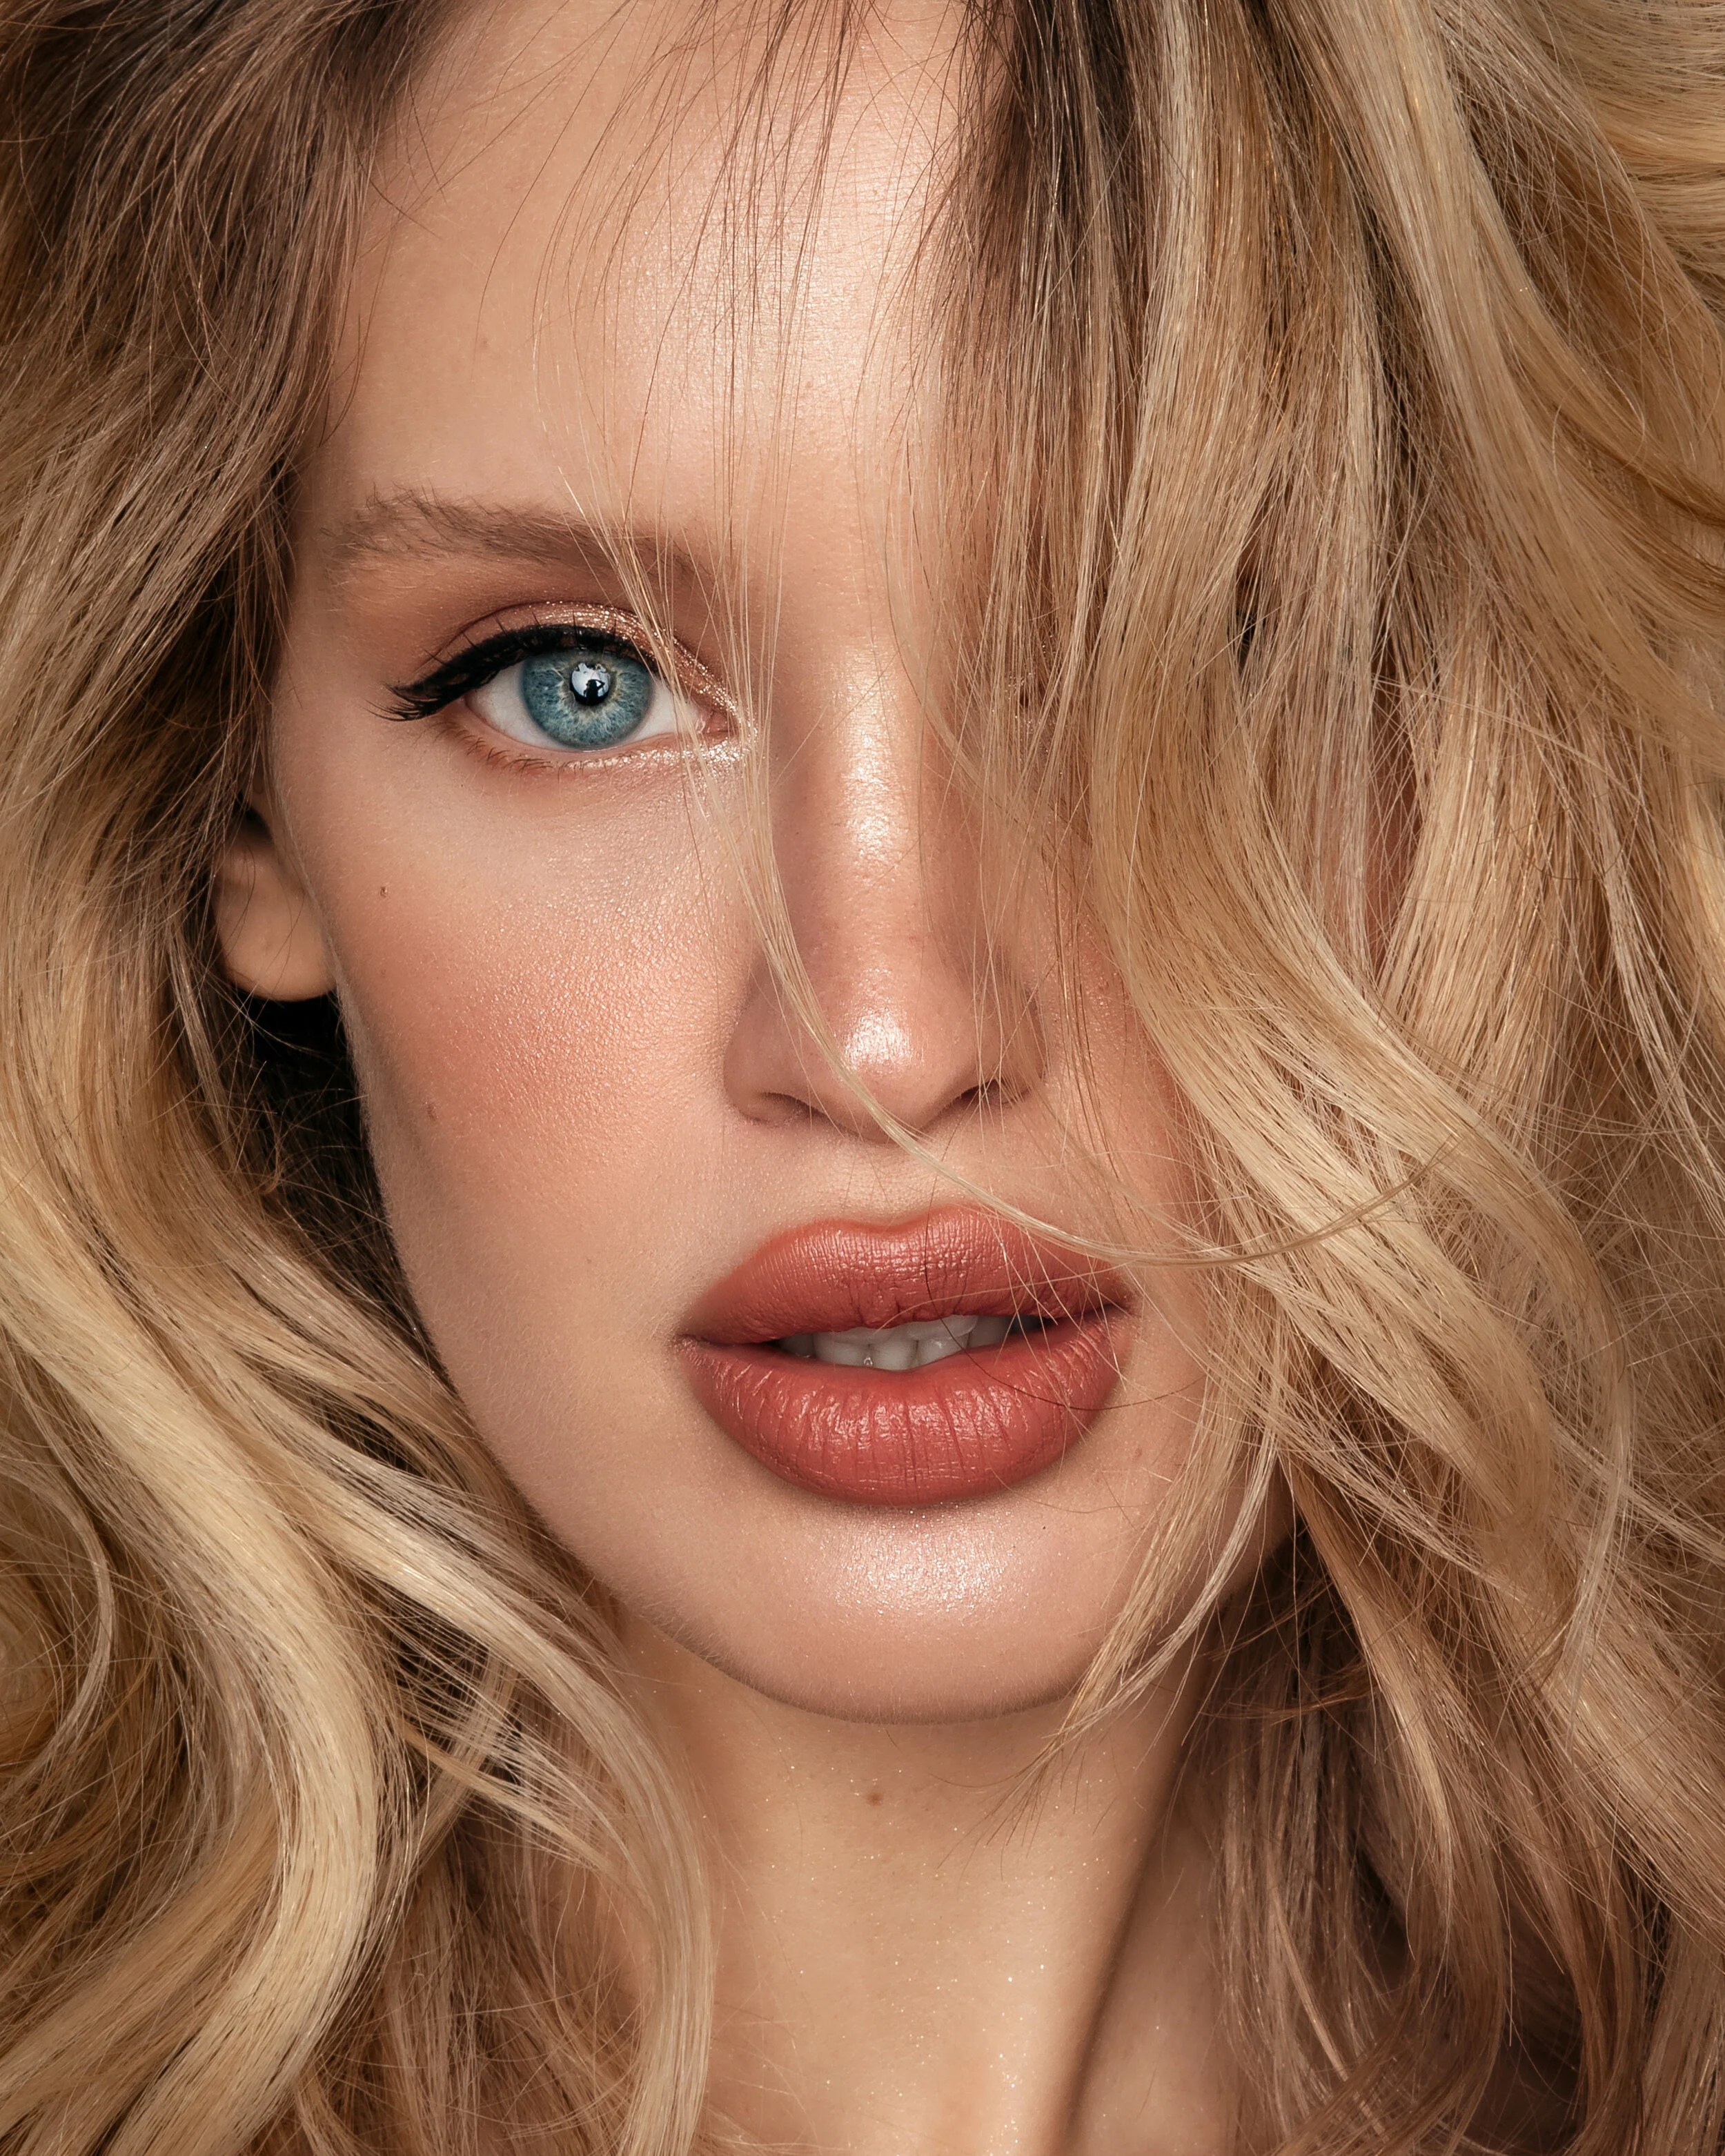
Danielle Cordick with Hair and Make Up by Rio Translado